I have been remiss in posting, but (and this seems to be a recurring theme) I am too busy actually making things to think much about blogging. In addition to sewing for the HSM, I have also been working on a 16th century Ottoman entari and new tarpus.
For the Protection Challenge, I decided to make a pair of late 16th century Italian drawers. It's not a really glamorous project, but I made two promises to myself about the HSM this year. 1) I would finish it this time if it killed me and 2) what I made for each challenge had to be something I would actually find useful.... I'm still waiting for an opportunity to use the rhinestone heeled shoes from my last HSM.
Most of the SCA events we go to are outside, which means using portajohns. Wrangling 16th century skirts in one of those is no fun. There had been some mention on some of the groups I follow (Elizabethan Costuming maybe?) that open drawers were easier to manage than modern ladies underthings. And they would make me feel a bit more accurate from skin out.
I'd been meaning to make the Margo Anderson drawers from the Italian Ladies Underpinnings set, but when I finally pulled out the pattern, they had an attached crotch. I could have modified it, but Patterns of Fashion 4 had two pairs of drawers in it. Since my waist measurement fluctuates (usually down, thankfully), I decided on the pattern for the drawstring waist rather than the waist band.


Arnold's note on the original pair (Metropolitan Museum of Art TSR 10.124.3) said they were made out of "even weave white linen, light in weight (discolored), closely woven"1 One of Margo's notes on the drawers in her pattern was to use a linen suitable for a shirt or summer pants or they would tend to ride up uncomfortably.2 Since I had some 019 from Fabric-Store.com on hand, I decided to use that.
For the Protection Challenge, I decided to make a pair of late 16th century Italian drawers. It's not a really glamorous project, but I made two promises to myself about the HSM this year. 1) I would finish it this time if it killed me and 2) what I made for each challenge had to be something I would actually find useful.... I'm still waiting for an opportunity to use the rhinestone heeled shoes from my last HSM.
Most of the SCA events we go to are outside, which means using portajohns. Wrangling 16th century skirts in one of those is no fun. There had been some mention on some of the groups I follow (Elizabethan Costuming maybe?) that open drawers were easier to manage than modern ladies underthings. And they would make me feel a bit more accurate from skin out.
I'd been meaning to make the Margo Anderson drawers from the Italian Ladies Underpinnings set, but when I finally pulled out the pattern, they had an attached crotch. I could have modified it, but Patterns of Fashion 4 had two pairs of drawers in it. Since my waist measurement fluctuates (usually down, thankfully), I decided on the pattern for the drawstring waist rather than the waist band.

Arnold's original pattern from Patterns of Fashion 4

Yup, that looks right to me.
Arnold's note on the original pair (Metropolitan Museum of Art TSR 10.124.3) said they were made out of "even weave white linen, light in weight (discolored), closely woven"1 One of Margo's notes on the drawers in her pattern was to use a linen suitable for a shirt or summer pants or they would tend to ride up uncomfortably.2 Since I had some 019 from Fabric-Store.com on hand, I decided to use that.

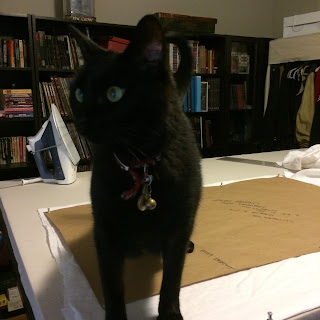
Sam supervising while I cut the pieces out


 Pulling the threads out can be a bit of a pain but the end result is worth it


One of my ongoing projects is researching medieval and Renaissance sewing tools and creating a historically accurate set for practical use, so I started by using a hand forged steel needle I have. It's 47mm in length and 2mm wide at the eye. It appears to be based on a find in the Museum of London.3 However, it was like sewing with a log. I normally find hand sewing restful and rather zen, but sewing with this needle was actively unpleasant. I blush to admit it, but I quickly wimped out and went back to a modern needle.

This needle is HUGE!
I also started this project using some extant 16th c. pins that I purchased for a surprisingly reasonable price from www.crossmancrafts.uk. However, I move from room to room with my sewing a lot and take my sewing basket with me places and I was too worried that I would lose one of the 10 pins I had, so I reverted to using modern pins.

Apparently pins haven't changed much in 400 years.
The extant pair were sewn with pink silk, so I used Gutermann silk topstitch thread for my seams, which were done run & fell style.

If I make another pair, I will skip the pink thread, I honestly don't think it adds all that much.
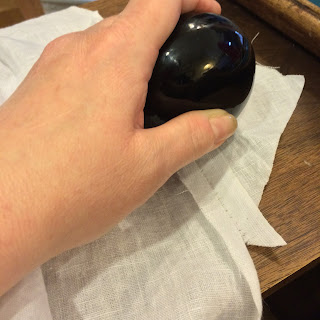
One other piece of medieval technology I tried and actually liked a lot was my sleek stone. Sleekstones, also called linen smoothers, slicken stones or calenders, were usually made of stone or glass and were used without heat, but often with water, to smooth linen and presumably press seams open. Extant examples of sleekstones date back to at least the Viking era and they were used well after the invention of the solid iron. I got mine at www.historicalglassworks.com. Since I move around a lot with my sewing, keeping one in my sewing basket is very handy.

My sleekstone does a surprisingly good job on linen, even without heat.
The extant pair has embroidery around the bottom of each leg, but since this was an experimental project, I didn't want to take the time to do embroidery. But I did want to do something decorative. A friend gave me a tutorial on drawn thread work last month, so I decided to do a bit of hem stitch & ladder stitch. It actually went much faster than I expected. And I am now completely addicted to to drawn work! I'm still a rank beginner, but it is really zen to do and I see a lot more of it in my future.


My first finished leg!
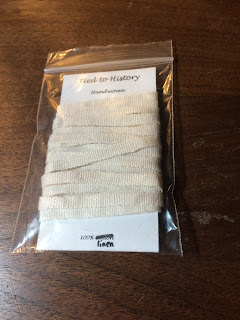
A friend of mine sells handwoven narrow wares and trims and I used 1/4" linen tape from her as a drawstring.

Alessandra does lovely work!
I am not a small person, so I was a little worried that the finished drawers would be a bit small, but they are actually enormous!

The finished project
All in all this was a relatively easy but useful project that I'd been meaning to make for a while. And bonus: it got me hooked on drawn thread work.
The Challenge: #3 Protection
Material: 5.0 ounce linen
Pattern: Patterns of Fashion 4: 64. c. 1600 pair of drawers
Year: 1600
Notions: silk thread, handwoven linen tape
How historically accurate is it: 80%? Materials were accurate.. mostly. Technically, the silk thread would have been 2 ply not 3 ply and modern linen and 16th century linen have significant differences. 100% hand sewing but other than the experiments with HA tools that I mentioned I used modern tools.
I also have no definitive indication that hem stitch was used on drawers. I can document it to collars & shirt cuffs and the occasional partlet in paintings, but with occasional exceptions drawers were rarely seen in 16th c art so actual examples are few and far between. If drawn work was done on other "fatta en casa" garments, I don't think its implausible that it might have been used on drawers
Hours to complete: 10 -12. (I really need to improve my hand sewing speed)
First worn: The next time I wear my 16th c. Italian garb. We're doing 3 events in April so it will be sometime soon!
Total cost: $24 for the silk thread and linen tape (but I have excess of both to use on other projects)
_________________________________________________________
1 Arnold, Janet. Patterns of Fashion 4. London: Macmillan, 2008. ISBN: 978 0 333 57802 1. Page 106.
2 Construction Notes from Margo Anderson's Italian Ladies Underpinnings
3 Egan, Geoff. The Medieval Household: Daily Living 1150-1450. 2nd ed. Suffolk: Boydell Press, 1998, 2010. ISBN 978
1843 83543 1. Page 267.


