Sunday, April 17, 2016

The Merlot entari (or Famous last words: this will be simple and fast)

A post in between HSM challenge posts...  say it isn't so.  As usual, I am working on a variety of things and we have been going to SCA events nearly every weekend, so there is never enough time to do even a fraction of what's on my project list, much less blog about it.

But I have finished (finally!) an entari I am reasonably satisfied with, so I have something to wear besides my rust Italian gown. *happy dance*

My entari

extant late 16th c. entari of a similar style  from www.turkishculture.org

example of  çaprast down the front of an early 16th c. garment from www.turkishculture.org

Illustration that inspired the colors (which upon further reflection looking at the hat, is actually probably post 1600)
from Recueil de costumes turcs et de fleurs Bibliotheque Nationale de France www.gallica.bnf.fr

I actually started this project back in late January, thinking that I'd knock out a fast new entari and wear Ottoman for Midwinter A&S. *cue ominous music*

I had some merlot colored cotton with a lovely hand to it in the stash and I got the pattern cut out and started construction easily enough.  Then I got to attaching the front and back at the shoulder.  I could split the front up the middle and move on with construction.  That would have been the sane and responsible thing to do. 

But I had a pile of 9 finger-looped black braids that had not worked out as points for Pietro's hose. The braids fell onto the fabric and  now I had a vision of black çaprast down the front of the entari.  

I was lost.  I couldn't not add the çaprast now.  After all...  I wasn't doing anything else with the braids. And of course, once I got started the 9 braids weren't nearly enough, so there was more finger-loop braiding and much hand stitching of trim (and then taking off and resewing of trim in other positions once I tried it on).

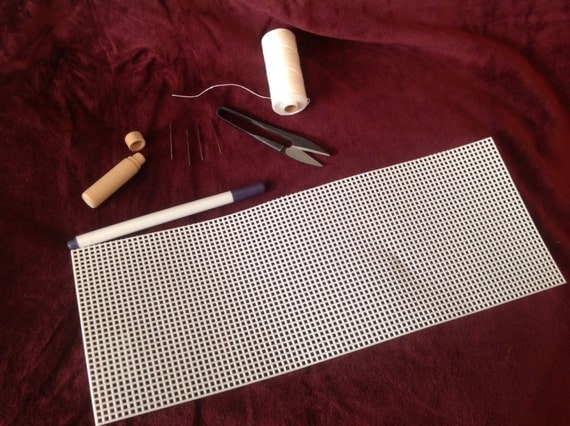
I started out with the front flat on my cutting table marking lines where I planned the çaprast and starting to stitch the trim while it was on the table. But as the projected dragged out after Midwinter, I needed the cutting table and I ended up wrapping the front around a macrame board and pinning the excess on the back like a dress shirt in its package.  

That actually turned out to be an inadvertent, but brilliant idea.  It made stitching the trim go much faster since I could turn the board as needed rather than try and stretch myself over the cutting table.


çaprast in progress on the macrame board

Once the çaprast were on, the rest of the garment went together without much incident.  The fabric was generally well behaved, the lining didn't sag in odd spots and the facings didn't pull or buckle peculiarly. 

Typically 16th c. Ottoman women wore more than one entari over their gomlek (the Ottoman equivalent of a camicia) so I reused the Caterpillar entari  to wear underneath and made a pair of long sleeves for the previously short sleeved garment.  One of the many reasons that I am enchanted with 16th c. Ottoman is the detachable sleeves.  It expands the mix and match options of a limited garb wardrobe exponentially.

extant late 16th c. entari with detachable sleeves from www.turkishculture.org

I got this done for Coronation...  only a month and a half after my original goal and I've worn this outfit to several outdoor events (90% of  SCA events in Meridies are mostly or entirely outdoors)  It is amazingly practical.  I still have the swish of skirt around my ankles,  but I don't trip over my hem or drag it in the mud, I can take off the sleeves if it gets warm in the afternoon and if I'd doing something like loading/unloading the car, I can tuck the front hems in my belt and it's not only practical, it's actually historically accurate!

illustration from Codex Vindobonensis 8626  c. 1590 at the Austrian National Library


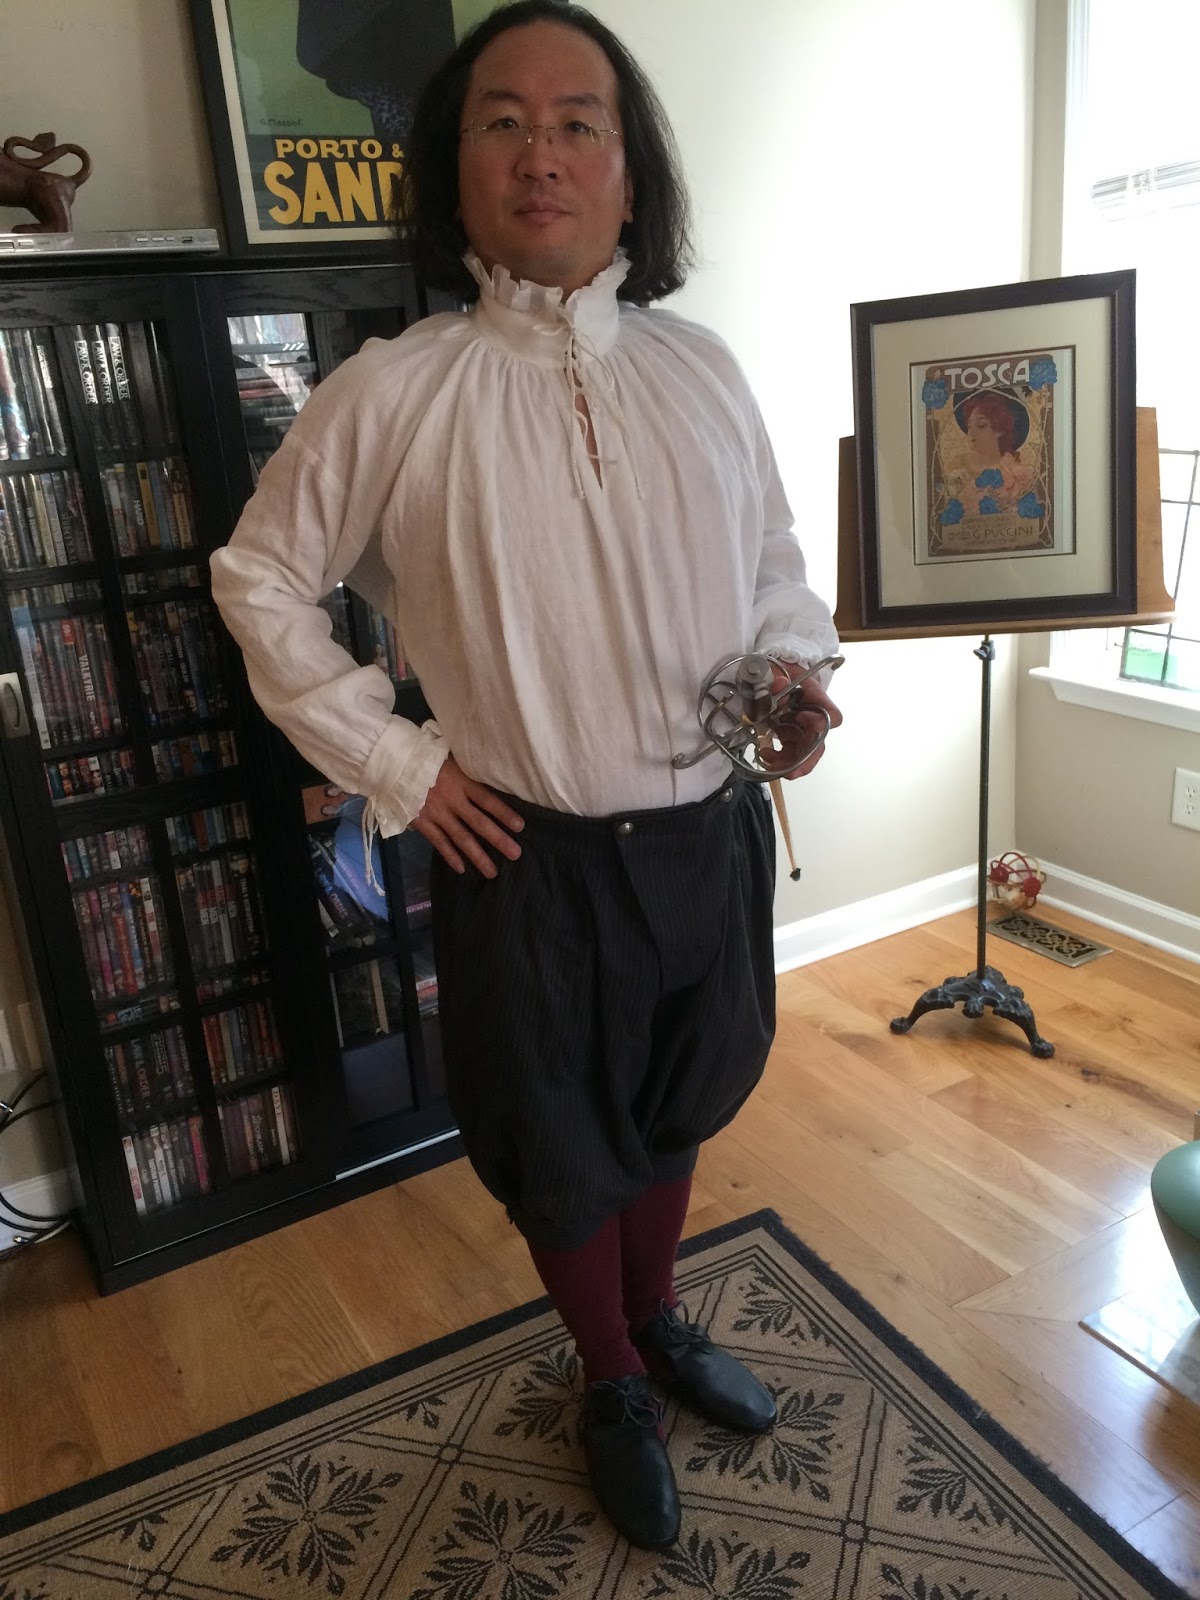
In other news, Jay has finished his first blackwork project: a collar and cuffs and I am making a shirt using them and I am also still in the midst of my drawnwork obsession so there is much going on... watch this space!

Thursday, March 31, 2016

HSM Challenge #3: Protection: 1600 Italian drawers

I have been remiss in posting, but (and this seems to be a recurring theme) I am too busy actually making things to think much about blogging. In addition to sewing for the HSM, I have also been working on a 16th century Ottoman entari and new tarpus.

For the Protection Challenge, I decided to make a pair of late 16th century Italian drawers. It's not a really glamorous project, but I made two promises to myself about the HSM this year.  1) I would finish it this time if it killed me and 2) what I made for each challenge had to be something I would actually find useful....  I'm still waiting for an opportunity to use the rhinestone heeled shoes from my last HSM.

Most of the SCA events we go to are outside, which means using portajohns.  Wrangling 16th century skirts in one of those is no fun.  There had been some mention on some of the groups I follow (Elizabethan Costuming maybe?)  that open drawers were easier to manage than modern ladies underthings. And they would make me feel a bit more accurate from skin out.

I'd been meaning to make the Margo Anderson drawers from the Italian Ladies Underpinnings set, but when I finally pulled out the pattern, they had an attached crotch. I could have modified it, but Patterns of Fashion 4 had two pairs of drawers in it.  Since my waist measurement fluctuates (usually down, thankfully), I decided on the pattern for the drawstring waist rather than the waist band.

 Arnold's original pattern from Patterns of Fashion 4

Yup, that looks right to me.

Arnold's note on the original pair (Metropolitan Museum of Art TSR 10.124.3) said they were made out of "even weave white linen, light in weight (discolored), closely woven"1  One of Margo's notes on the drawers in her pattern was to use a linen suitable for a shirt or summer pants or they would tend to ride up uncomfortably.2  Since I had some 019 from Fabric-Store.com on hand, I decided to use that.

Sam supervising while I cut the pieces out

One of my ongoing projects is researching medieval and Renaissance sewing tools and creating a historically accurate set for practical use, so I started by using a hand forged steel needle I have. It's 47mm in length and 2mm wide at the eye.  It appears to be based on a find in the Museum of London.3  However, it was like sewing with a log.  I normally find hand sewing restful and rather zen, but sewing with this needle was actively unpleasant.  I blush to admit it, but I quickly wimped out and went back to a modern needle.

This needle is HUGE!

I also started this project using some extant 16th c. pins that I purchased for a surprisingly reasonable price from www.crossmancrafts.uk.  However, I move from room to room with my sewing a lot and take my sewing basket with me places and I was too worried that I would lose one of the 10 pins I had, so I reverted to using modern pins.

Apparently pins haven't changed much in 400 years.

The extant pair were sewn with pink silk, so I used Gutermann silk topstitch thread for my seams, which were done run & fell style. 

If I make another pair, I will skip the pink thread, I honestly don't think it adds all that much.

One other piece of medieval technology I tried and actually liked a lot was my sleek stone. Sleekstones, also called linen smoothers, slicken stones or calenders, were usually made of stone or glass and were used without heat, but often with water, to smooth linen and presumably press seams open. Extant examples of sleekstones date back to at least the Viking era and they were used well after the invention of the solid iron.  I got mine at www.historicalglassworks.com.  Since I move around a lot with my sewing, keeping one in my sewing basket is very handy.

My sleekstone does a surprisingly good job on linen, even without heat.

The extant pair has embroidery around the bottom of each leg, but since this was an experimental project, I didn't want to take the time to do embroidery.  But I did want to do something decorative. A friend gave me a tutorial on drawn thread work last month, so I decided to do a bit of hem stitch & ladder stitch. It actually went much faster than I expected. And I am now completely addicted to to drawn work!  I'm still a rank beginner, but it is really zen to do and I see a lot more of it in my future.

 Pulling the threads out can be a bit of a pain but the end result is worth it

My first finished leg!

A friend of mine sells handwoven narrow wares and trims and I used 1/4" linen tape from her as a drawstring.

Alessandra does lovely work! 

I am not a small person, so I was a little worried that the finished drawers would be a bit small, but they are actually enormous!  

The finished project

All in all this was a relatively easy but useful project that I'd been meaning to make for a while. And bonus: it got me hooked on drawn thread work.

The Challenge: #3 Protection

Material: 5.0 ounce linen

Pattern: Patterns of Fashion 4: 64. c. 1600 pair of drawers

Year: 1600

Notions: silk  thread, handwoven linen tape

How historically accurate is it: 80%?  Materials were accurate..  mostly.  Technically, the silk thread would have been 2 ply not 3 ply and modern linen and 16th century linen have significant differences. 100% hand sewing but other than the experiments with HA tools that I mentioned I used modern tools.

I also have no definitive indication that hem stitch was used on drawers.  I can document it to collars & shirt cuffs and the occasional partlet in paintings, but with occasional exceptions drawers were rarely seen in 16th c art so actual examples are few and far between.  If drawn work was done on other "fatta en casa" garments, I don't think its implausible that it might have been used on drawers

Hours to complete: 10 -12. (I really need to improve my hand sewing speed)

First worn:  The next time I wear my 16th c. Italian garb. We're doing 3 events in April so it will be sometime soon!

Total cost: $24 for the silk thread and linen tape (but I have excess of both to use on other projects)

_________________________________________________________
1 Arnold, Janet.  Patterns of Fashion 4. London: Macmillan, 2008.  ISBN: 978 0 333 57802 1. Page 106.
2 Construction Notes from Margo Anderson's Italian Ladies Underpinnings 
3 Egan, Geoff. The Medieval Household: Daily Living 1150-1450. 2nd ed. Suffolk: Boydell Press, 1998, 2010. ISBN 978 1843 83543 1. Page 267.

Tuesday, March 8, 2016

HSF Challenge #2: Pleats and Tucks

This post is very tardy. I finished the apron on time for the February challenge, but was out of town for work for a week, so I am just now getting the blog post written up

My original plan was to do a make a new Italian gown to wear for Midwinter Arts & Sciences in February and use for the "Pleats and Tucks" challenge since the skirt would be pleated to the bodice and 16th century gowns often have a tuck at the bottom. Except that I kept waffling on a clear concept and nothing got started.

So with half of February already gone I decided to make an apron to go with my late 16th Italian working class gown. It wasn't an brilliantly exciting project, but it would have pleats and I'd been thinking about making one for a while (Too many projects, too little time!)

I'd read a little about smocking at germanrenaissance.net and pleatworkembroidery.com and I'd always been meaning to try my hand at smocking, so I decided on an apron with some simple smocking on it.

Different types of smocking stitches


Both sites had what seemed to be solid references for their information (including a fascinating article on How to Pleat a Shirt in the 15th Century discussing extant garment fragments from Lengberg Castle) I used the apron tutorial from germanrenaissance.net in lieu of doing my own research but I did learn a few things.  Smocking is more of an 18th-19th century term; the German word is "fitz-arbeit" (literally pleatwork) and pleatwork seems to be the more accepted term for it in the reenactment circles.  It was especially popular in Germany, Italy and to a lesser extent England in the late 15th - early 16th centuries and can be seen on collars, cuffs and aprons in paintings and engravings such as this one (her apron has pleatwork at the top):

Albrecht Durer 
Melencolia I
1514

While white aprons were the most common in the era, there are some examples of colored aprons in paintings such as Campi's The Fruit Seller.

Vincenzo Campi
The Fruit Seller
1580

Since my current gown is based on a Campi painting, I decided to use some sea glass green linen I had on hand.  (Fabric-store.com calls it "turquoise" but its really a lovely winter sea color.)

The tutorial provided (what I thought was) a handy template for placing the dots on the fabric but the prick and pounce method of transferring the dots was a complete fail.

 the template from germanrenaissance.com

Sam supervising me punch a whole lotta holes in the template

While I finally got the transferred with a fabric marking pencil, I knew if I ever wanted to do more pleatwork (and I was pretty sure I did) I knew I'd need a better method.  So I picked up a smocking kit from PimpYourGarb on Etsy.  I haven't used it yet, but it looks infinitely easier than my current template.

Smocking kit from PimpYourGarb on Etsy


Once I had the dots on the fabric, the actual apron went together pretty easily. So easily in fact that I forgot to get process pics.  Hem the three edges of the fabric without the dots run gathering threads through each row of holes, gather into pleats and smock.  I used a honeycomb stitch which consists of stitching the first 2 pleats of the top row together with a few small stitches then the 2nd & 3rd pleats together at the second row, the 3rd & 4th of the top row, et al for each 2 rows of gathering threads.  (the tutorial I linked above does a much better job of explaining the technique) Once it was smocked, I put on the waistband and voila, the apron was complete.

 The finished apron

Closeup of the smocking

I learned a lot from this first attempt and reading a few more tutorials.  In retrospect, I'd add more rows of dots so the smocked section was deeper  and I'd probably use a 1/4" grid for the dots. But its definitely a technique I enjoyed playing with and I plan to do more of.  In fact, I am sorely tempted to do v2 of the apron for the protection challenge this month.

The Challenge:  #2  Pleats and Tucks

Material: Linen


Year: This style of apron can be seen in paintings, woodcuts, etchings from the 14th - early 16th centuries.

Notions: Poly thread (I thought I had linen thread of a similar color but I didn't)

How historically accurate is it:  60%? The end product is visually similar to various paintings, etchings and woodcuts from the 14th -early 16th centuries.  The proportions are similar to several extant late 16th- early 17th century decorative aprons in the Art Institute of Chicago and the Met. The extant aprons linked above are made of linen so a case can be made for linen being historically accurate. But there have been multiple comments on the Elizabethan Costume group that wool would be more appropriate for an apron for the simple fact that the risk of it catching fire is lower. To be honest, I haven't done enough research to know if wool would be more accurate for a working class apron or not. All the stitching on it was done by hand; however, the thread is inaccurate and the method of transferring the dots is decidedly modern.

Hours to complete:  6-8.  At least half of it was punching holes in the template, enlarging holes in the template and finding a successful method to transfer the dots.

First Worn: February 27 at the Meridian Challenge of Arms

Cost:  $0.  Everything was out of the stash.

Saturday, January 30, 2016

HSF Challenge #1: Procrastination: late 16th century shirt for rapier combat

As winter settles in and life is (slightly) calmer, the time has come to break down and tackle some of the un-glamorous sewing that I've been procrastinating on all autumn.  Jay and I are probably going to Gulf Wars in March (a week long medieval camping event for those of you not in the Society for Creative Anachronism) and while both of us have a decent set of 16th century clothing and a change of shirt/camicia now, there had never been time to make enough camicia and shirts to get through more than an overnight event. And rapier fighting is sweaty, so a clean shirt every day is a necessity.

So this month is "fatta in casa"1 sewing:  linen underthings traditionally made by the female members of the household.  And it works nicely for the procrastination challenge. When Jay got into rapier combat in the SCA we bought fabric for me to make him a set of rapier garb but it turned out that buying him a basic set would let him start playing a lot faster than waiting for me to make it. I've been meaning to start a set of rapier combat legal garb for him, but there was always something more pressing.  This challenge was my excuse to stop procrastinating and make him a decent shirt.

I started with pattern #9 from Patterns of Fashion 42.  a shirt c.1580-1620 from an extant garment (37-1962) at the Warwickshire Museum Service. Jay isn't a particularly unusual size for a man and shirts are forgiving, so I drafted up the pattern straight from the book and didn't make any size adjustments, although I questioned the narrowness of the sleeves originally.  Then I realized that the shirt was mean to be worn under a doublet with sleeves and it all made sense.

base pattern from Patterns of Fashion 4 

I made 2 deviations from the pattern:  I shortened the length to  36" because I  wanted to get 3 shirts out of the 9 yards of linen (Fabric Store 019 5.4 oz) I had on hand. I also enlarged the gusset to 10" because rapier combat requirements states: "acceptable minimum armpit coverage is provided by a triangle extending from the armpit seam. covering the lower half of the sleeve at the seam and extending down the inner/under arm one third the distance to the fighter's elbow"
Since this was going to be a "functional beta" to make sure the shirt worked for rapier combat, I decided I would do as much by machine as I could to save time. Me being me, this meant I still ended up doing 50% handwork.

For the gussets, I determined that 2 layers of Fabric Store 019 and 2 layers of the 090 was the minimum that would pass the drop test to make it combat legal so I machine quilted the 4 layers together.  The end result definitely felt padded and made felling the seams a bit tricky.  I may see what combination of linen and silk passes the drop test and try interlining the gussets for the next one in silk for less bulk.

The quilted end result

To minimize bulk as best I could in the seams, I cut the seam allowance off the interlining pieces and basted them in before quilting all 4 pieces together.

The interlining before I put the final piece on top and started basting

The neck gussets went in easily enough by hand using a hem and whip stitch method.  I guess I made a third deviation because  the pattern uses square gussets and I used 4 triangular gussets, stitching the second piece wrong sides together for a tidy finished edge on the inside.

underside of gusset 

For the collar and cuffs, I cut a 2" strip 2 yards long for the collar and a yard each for the cuffs and did a tight gather, based on the Nils Sture shirt pieces in PoF4.  I machine gathered each strip and attached it by machine, then put the lining piece in by hand.  I'm not sure how traditional a method this is, but I like it because it guarantees I won't catch part of the ruffle when I machine stitch the ends. I used an interlining of the 019 linen for both collar and cuffs to give them a little more body. Due to fabric constraints, my cuff and collar aren't as full as the Sture shirt, but they still came out pretty well, I think. I used the selvage edge as the finish for all pieces.


I'd intended to use hooks and eyes to close the collar and cuffs, since this was just a functional beta.  but at this point, I was really liking how it was turning out, so I did a simple finger loop braid for the collar and sleeve ties. I attached the collar ties in the seam allowance before I put in the lining, but I decided follow the Sture shirt example and put in an eyelet on each side of the cuff for the ties.  In looking back more closely at the pattern, I see that the sketch of the cuff only has an eyelet on one side, not both.  Note to self:  refer to your original documentation more during the construction process.

collar ties


putting an eyelet in the cuff

The finished shirt came out well and I am very pleased with the gussets. They will definitely serve well for rapier combat.  Since they're enlarged for armor protection, they appear to droop a bit in the picture, but once his doublet (sleeveless) is on, they sit just fine.


The whole project hit a good balance of function and historical accuracy and there weren't any moments which made me curse like a sailor.  Doing several more of these will be a pleasant thing to do while watching Netflix. In fact I already have shirt #2 cut out and in the sewing basket.

The Challenge:  #1 Procrastination

Material: 2 yards 25" of linen (+ 3/8 of a yard for gusset interlining)

Pattern: pattern #9 from Patterns of Fashion 4.  a shirt c.1580-1620 from an extant garment (37-1962) at the Warwickshire Museum Service.

Notions: poly thread for machine sewing, 80/2 linen thread for hand sewing, cotton #10 crochet cord for ties.

How historically accurate is it? perhaps 70%? The base pattern & fabric are accurate, but I adjusted the pattern to make it rapier combat legal, did some machine sewing on it and the ties should probably have been made of linen rather than cotton. I also wasn't specifically following accurate seam finishing techniques.

Hours to complete? 2 weeks of my evenings and weekends sewing time so 15-20 hours.

First worn:  probably 27 February at the Meridian Challenge of Arms

Total cost:  $0.  We bought the fabric last summer so everything was from the stash.


I've also made 2 Italian camicia for myself and a functional beta of a 15th century men's shirt based on Master Lorenzo's research.  It's been a productive start to 2016!

_______________________________________
1  Brown, Patricia Fortini. Private Lives in Renaissance Venice.  New Haven: Yale University Press 2004.
2. Arnold, Janet.  Patterns of Fashion 4. London: Macmillan, 2008. 

Friday, January 15, 2016

The Kindness of Strangers (friends too!)

I've been struggling to get motivated to revise and expand my A&S project to submit at Midwinter. I'm researching sewing tools 1150-1600 as a basis for a creating a historically accurate sewing basket. I will post the details of my research once I get done with the revisions, but I wanted to share the story of two wonderful people whose kindness has been a huge help and rekindled my motivation.

The Museum of London has an extant example of a wooden thread reel (what we think of as a spool now) from 1150-1200.  Medievaldesign.com has a nice reproduction but they're based in Italy and have a 50 euro minimum order...and shipping from Italy.  We had savanarola chairs shipped from Poland and I was not anxious to deal with international shipping again, even for small items.


reproduction thread reel available at medievaldesign.com

And the Tudor thread reels that I really wanted, having a late period persona, didn't seem to be available for sale anywhere. The Mary Rose Trust used to offer reproductions but they've been unavailable from their site for months.

artifacts from the Mary Rose, 1545. (www.maryrose.org)


While I'm completely open to trying new crafts, I knew I would never be a tolerable enough woodworker by Midwinter to make thread reels myself. And being a (semi) responsible adult with a a time job, I only had so much time to devote to my projects.  I had a long list of projects with higher priority (like making sure Jay and I had enough clothes to wear at Gulf Wars) than learning woodworking just to make bobbins for my A&S  project.  I'd been dragging my heels on ordering from Medieval Design, hoping I would find a better option, and a bit out of steam on the whole research project, but Midwinter A&S was fast approaching, so I needed a plan.. and soon.

Then in the middle of a recent, wakeful night my mind wandered back to a Facebook non SCA friend, Eric that had started posting pictures of the wooden pens he was making as a hobby....and that a pen and a spindle were a similar shape...   I messaged him the next day, explained my project and asked if he would take a commission for a couple of thread reels. I was a bit concerned I was imposing, but he agreed readily and said he would only charge me for materials & tools he didn't already have and asked me to email him the info I had on the existing examples.

When I googled looking for the picture above, one of the results I got was a picture from a blog:


That book page looked much like the info in Egan's The Medieval Household, discussing the Museum of London find, but discussing the Mary Rose reels. Suddenly I was excited..  a source I hadn't seen with info on sewing tools...there was a page number, and in the comments was the title:  Before the Mast: Life and Death on the Mary Rose.  But Amazon wanted $89 for a copy, the Mary Rose Trust wanted 55 pounds and inter-library loan would take 6 weeks or more. (don't get me on my soapbox about our local  public library system :) )

So I asked on the Artisan of Meridies group if anyone had a copy of Before the Mast and was willing to get me a copy of p. 328.  And...  and....  a kind lady named Barbara who I has never met had a copy and was willing to scan me the whole 4 page section on sewing tools and then provide me biblio info on the sources cited in that section.  I was incredibly grateful and over the moon!

But my amazing luck didn't end there.  Eric messaged me the next day asking all sorts of thoughtful questions that I hadn't thought about: What kind of wood was I thinking of? Walnut would be darker than the pictures but he would recommend ash.  Was American wood acceptable since the sources I sent him were British?  What sort of finish did I want: smooth sanded or oil rubbed? 

Not too long after that, Eric sent me a photo of the blocks he'd cut to make the spindles:


 .And the branches he'd made the blocks from:


And the tree the branches came from:


Apparently, he'd cut down an ash tree from his yard last year and saved the wood!

So thanks to the kindness of Barbara & Eric, my enthusiasm  is back with a vengeance and I am (hopefully) on track  to meet the submission deadline.

Lots of other sewing projects in the works as well; it's been a crazy productive month. But if I'm spending time blogging, then I'm not spending time sewing.  So I'm off to sew....  watch this space!


Wednesday, January 6, 2016

Historical Disney

Back in August, I was invited to join a Historical Disney group: a cosplay of Disney characters at Castle Wars, an SCA event in mid-November. (Yes, this is January.  But I never got pictures of us in the outfits until a week ago) The fun part was that the cosplay had to harmoniously fit into the "pre-1600" timeframe of the SCA.

For myself, I was the caterpillar from Alice in Wonderland as a 16th century Ottoman woman.

from I Turchi. Codex Vindobonensis 8626. 1586-1591.


Getting my head wrapped around garment construction done solely with rectangles was harder than I anticipated (Mistress Jadi was instrumental in helping me through three mockups and answering countless questions) but  overall, I'm pretty pleased with my first attempt at Ottoman.  I am especially pleased with how the tarpus (hat) turned out. It's a buckram frame construction and the pattern actually started out life as a 1880s hat.  Since I'd sized up the pattern to fit my head when I made the 1880s hat, the hard part was already done and everything went together smoothly over the course of about a week.

                                                               
                                from Nicolas de Nicolay's Travels in Turkey                          

And Ottoman is surprisingly comfortable -especially compared to wrestling Italian skirts at outdoor events -especially with as soggy an autumn as Georgia has had.  So there is definitely more Ottoman in my future -but first more research, so I can get as familiar with Ottoman as I am with 16th century Italian. And I might be doing crazy things like trying to talk a rug shop in the UK into buying yardage of authentic Ottoman patterned fabric while they are on their next buying trip in Turkey.... more on that adventure if and when it pans out.

For Jay, the original plan was to do an 16th Century White Rabbit at the Trial in Alice in Wonderland. I had such plans for this.  My vision was  something along like these lines.

Santi di Tito -Portrait of a Gentleman


I'd found some lovely ivory cotton brocade and red velveteen and even a 1598 embroidery pattern that had a heart pattern for the trim on the edge of the cloak.  But life intervened and late October it became clear that I was just not going to get it started, much less finished for Castle Wars in mid- November.  (at that point it was still debatable whether I was going to get my Ottoman outfit done)
So Jay and I agreed that it was out of scope for Castle Wars.

Whew.  One thing off the to-do list. Or so I thought.  Two weeks before the event, on Saturday morning before I've had a chance to have coffee, Jay springs his new plan on me:  he's going to buy T-tunics off the internet and do a Viking Gaston from Beauty and the Beast.  I  felt a headache right between my eyes begin.  Then he showed me the t-tunics he was looking at on etsy.  And the headache got worse.

While there is a lot of excellent handmade kit on etsy, what he'd found was....  not. It was embarrassing to have people think I'd done such poor quality work and equally embarrassing to have Jay going around telling people he'd bought t-tunics when everyone knows I sew.  And I had black Rus pants that I cut out ages ago but never started construction on and a piece of a lovely mustard colored linen that would  be just enough for a t-tunic. So suddenly, there was a set of Viking to be done in 2 weeks.  But I knew that I couldn't just knock the garb out and move on...  I'd hate seeing him in it if I wasn't happy with how I'd constructed it.  So there was much much hand-sewing involved.  The good news is that he should be wearing these t-tunics 10 years from now!


Disney Gaston


Viking Gaston

Despire the scope creep,  both outfits were worn at Castle Wars.  I  was doing hand work on mine up until about an hour before I actually  put it on, but let's not mention that, shall we? Thus ends the saga of Historical Disney..at least for this year.  At some point I will get the 16th century White Rabbit done if it kills me, but for next year, we're thinking of doing a 14th century Donald Duck for Jay.  *smirk*

Monday, December 7, 2015

16th c. working class Italian gown

It's been over 5 months since the last post and radio silence hasn't been because I haven't been working on anything, it's been because there are just not enough hours in the day to do everything I'm working on, maintain a full-time job and (semi) responsible adult life and find the time to blog.

We're doing the SCA pretty full time: Jay is mad about rapier combat, I was merchant steward for the 600 person Baronial event in November, got the Tower Or for service to the Barony, entered my first A&S comp this past weekend (I got a 17/20) and we're planning on doing Gulf Wars in March.   Aaaaaand I needed to garb both Pietro (Jay) and I.  Ironic that now have so many occasions to wear historical clothing that I don't have enough time to sew!  And I now have people to talk with about historical sewing!  oh the bliss!

The first project for me was a gown to replace my Ren Faire bodice and skirts. I rather like the paintings of Vincenzo Campi so I thought I'd make a late 16th century working class Italian gown. Once I had the pattern fine tuned, then I could work on something more elaborate.

The Fruit Seller d. 1580
Vincenzo Campi 

The talented Lady Alessandra Giovanna Fioravanti helped me drape a basic 16th century bodice and I used the skirt from Margo Anderson's Italian Lady's Wardrobe pattern. Since this was a first attempt, I deemed some rust linen/cotton that I had on hand "most expendable" for an alpha test project. I also found some deliciously awful mustard yellow wool felt for the doppia for $8.00 a yard; since it was never going to be seen, it was the perfect bargain.

I wanted to wear the gown ASAP, so I went with  mostly machine construction, following the Margo Anderson pattern instructions, machine quilting the interlining and using zip ties for boning. It's not a technique I'd use again, but I had the gown in a wearable state, in approximately 2 weeks of sewing time sandwiched in between work and real life.

Originally, I used the Margo method of sewing channels for ladder lacing in a ribbon inside the bodice.  I think I misunderstood the method or executed it incorrectly, because it was an epic failure and several channels ripped out first wearing.  Thankfully, a rush order of lacing rings from Renaissance Fabrics solved the problem and also improved the fit a bit although then I ended up losing weight and I ended up having to take it in several inches.  Over the autumn, I  finished a hand sewn partlet and sleeves.  I plan to do a roped petticoat and drawers this winter.

While there are improvements to be made in the next gown (and I'm never satisfied with anything I make) I've had several people tell me I look like I stepped out of a painting, so I must have done something right!


However, since it gets worn so frequently and Meridian events are almost always outside, it's begun to show a bit of wear and tear, (or maybe I'm just tired of only having one gown to wear) so I'm hoping to get a second gown done with all hand sewing completed before Gulf Wars.

I've also done a set of 16th century Ottoman,a set of Viking for Pietro as well as my A&S research that I will try and find time to post about soon.