Thursday, September 15, 2016

HSF #8: Patterns (or The challenge that almost wasn't)

This was a tough challenge to find inspiration for.  I had some lovely Renaissance patterned upholstery fabric that I bought last year to use for a 16th century gown, but I knew there was no way that I was going to finish a gown in a month even if I had a bodice pattern that I was happy with (which I didn't).  So mid-month, when no more exciting and executable idea had presented itself, I went with plan B:  A 16th century Italian saccoccia (pocket). I laughingly swear that the entire reason I wear 16th century Italian and 16th century Ottoman is that pockets were historically accurate.

Saccoccia are seen in various 16th century Italian paintings and here are also several extant Spanish examples, which are very similar to the ones in Italian paintings. Both the Italian and Spanish ones bear a strong resemblance to the 18th century pocket, examples of which are far more commonly found in museums. I have not come across any extant 16th century English examples, however a search on "pockets" at elizabethancostume.net  turned up 146 references in wills and wardrobe accounts. However, rather interestingly, the V&A article on the history of pockets starts in the 17th century not the 16th.  As does an essay from the Pockets of History collection at the University of Creative Arts. It's an interesting research rabbit hole, but outside the scope of this challenge, so it will have to wait for another time.

Based on the examples I'd found in paintings, the saccoccia appears in the mid 16th century, which was confirmed in Anea's excellent article that I stumbled upon later in my research. Working class women appear to have worn their saccoccia tied on over their gowns; upper class women most commonly wore theirs under their gown and accessed it through a slit in the skirt.


Study of a Woman with a Tray
Alessandro Allori
c. 1570-80
Provenance Unknown by me1

Even working class women could have saccoccia made of patterned fabrics and trimmed elaborately.

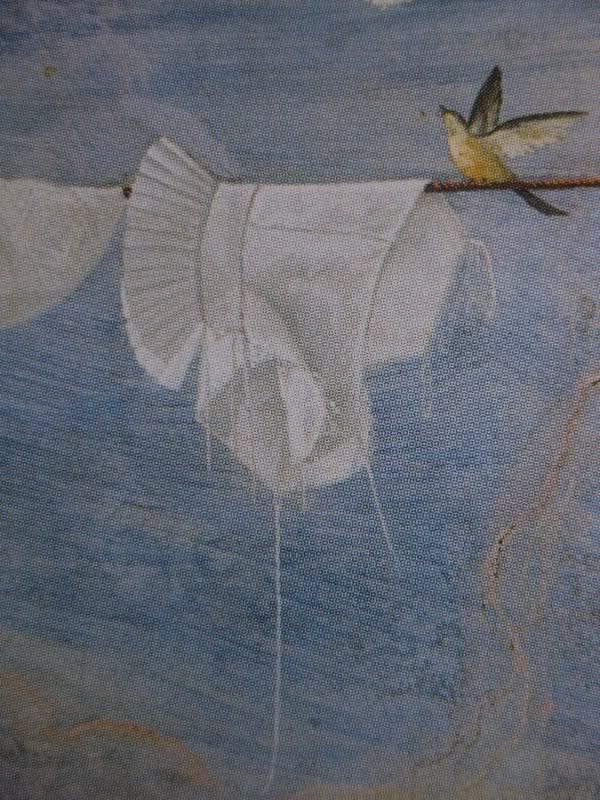
Detail from "Women at her toilet"
Allessandro Allori
c. 1575-78
fresco in Gaddi Chapel
Church of Santa Maria Novella, 
Florence, Italy


The fabric definitely qualified as patterned.  It was some upholstery fabric of unknown man-made fibers. I was initially reluctantly to use the fabric before I actually created the gown, but needs must if I was going to complete the challenge.  In retrospect, I'm glad I did, because this stuff frays like @#$% and was annoying enough to work with, that I will probably end up donating the rest of the bolt to a SCA rummage sale.  Life is too short to work with fabric that behaves that badly.


The pattern was easily enough drafted up and cut out.


I had some deep claret silk scraps in my scrap bin that were perfect for a lining and I was cooking with gas.  I was going to finish this challenge on time if not early! <insert ominous music>  Then the fabric started fraying like there was no tomorrow and I  threw the wretched thing in my sewing basket for a probably permanent time out and decided maybe I just wasn't going to do challenge #8.

I'd asked my dear friend, Mistress Alessandra, to make me some teal cotton petersham for the waist tie and while I was over at her house for a sewing day, the subject of the saccoccia came up.  She solved the problem handily enough by cutting off a chunk of the leftover she had from weaving my petersham up and said "bind the opening."  This is probably why she is the laurel and I am the student. :)

Not long after, I had a finished saccoccia.


The Challenge:  #8  Patterns

Material: 1/4 yard upholstery fabric, scraps of silk for lining

Year: later 16th century

Notions:  Silk thread, cotton petersham

Pattern:  Self drafted based on the examples in paintings

How historically accurate is it?  The fabric is man-made fiber.  Its hard to feel good about historical accuracy after that.  But the silk thread and hand woven cotton petersham are both plausible for the 16th century.  (Italy had had a cotton industry for several centuries at that point)

Hours to complete:  3-4 maybe

First worn:  Not yet.  It's still too warm to wear Italian.

Total cost:  $20 for the cotton petersham.  Everything else was from the stash,
_______________________________________________
1  I originally found this picture on www.modehistorique.com  but the location of the drawing was not  indicated.  Upon googling for the image, which is often helpful in establishing provenance, every hit seemed to lead back to either modehistorique or different Allori.  This is, in my experience, a red flag on  validity of the source.  Based on what I have seen of Allori's work, it doesn't seem implausible for it to be an Allori sketch, but I will feel easier when I can locate exactly what and where it is located. 


References

Anea. "A Renaissance Saccoccia." The Anea Costumes. np. 2016. Web. 15 September 2016. <http://elizabethancostume.net/cyte/search/node/pockets%20synonym%3A1%20>

Anea. "16th century Italy + loose pockets" Anea Costumes: Fashion and Design Past and Present. np. 2016. Web. 15 September 2016. "http://aneacostumes.tumblr.com/post/132201315761/16th-century-italy-loose-pockets-loose-pockets"

Burman, Barbara and Seth Denbo. "A History of Pockets" Visual Arts Data Service Pockets of History Collection. Surrey,  2016. Web. 11 September, 2016. <http://www.vads.ac.uk/texts/POCKETS/history_of_tie-on_pockets.pdf>

Leed, Drea. Queen Elizabeth's Wardrobe Uploaded.  The Elizabethan Costuming Page. Dayton, Ohio 2010.  Web. 14 September 2016. <http://elizabethancostume.net/cyte/search/node/pockets%20synonym%3A1%20>

Lorraine, Sarah. "I'm Done?" Mode Historique. San Jose, CA 2016. Web. 1 September 2016. <http://elizabethancostume.net/cyte/search/node/pockets%20synonym%3A1%20>

--- "A History of Pockets" Victoria and Albert Museum,  London, 2016.  Web. 11 September, 2016. <http://www.vam.ac.uk/content/articles/a/history-of-pockets/>

---.  Faltriquera 1575-1600. Museo del Traje Online Collection, Madrid, Spain 2016. Web. 15 September 2016. <http://museodeltraje.mcu.es/index.jsp?ruta=4%2C17%2C48&referencia=MT00790&id=48>

Sunday, August 21, 2016

Sunday Night Experiment: Hildegarde of Bingen's Small Cakes

I've been a bit lax in bottling last summer's batches of brandy and cordials so there was a bit of a frenzy over the last 2 weekends of straining off brandies and doing a first bottling to let the sediment settle.  The blackberries were too soft after soaking for 12 months to do anything with, but there was a nice quantity of brandied peaches.  And Tourney of the Foxes is next weekend, so I was planning on packing a nice picnic to feed starving fencers.  I'd been thinking peach shortcake but that didn't pass the "easy to eat" test then Mistress Kyra posted a picture of her daughter making peach hand pies on Facebook.  Bingo!  Brandied peach hand pies it was going to be.

At the grocery, I looked at the whole wheat flour, thought about buying it since I'm doing more Renaissance cooking these days and then thought " Nah...I don't have any recipes that need it right now."   Then I got home and was flipping through a copy of Duke Sir Cariadoc's "How to Milk and Almond, Stuff an Egg and Armor a Turnip" that had just arrived to replace an old copy that got lost over the years.  And came across his redaction for Hildegarde of Bingen's small cakes from her Physica.  Which I was immediately curious to make and, of course, required whole wheat flour.  So back to the grocery it was.

The original was from her entry on nutmeg and said "Take some nutmeg and an equal weight of cinnamon and a bit of cloves and pulverise them.  Then make small cakes with this and fine whole wheat flour and water.  Eat them often...It will calm all bitterness of the heart and mind, open your heart and impaired senses and make your mind cheerful.  If purifies your senses and diminishes all harmful humors"1

I remembered Hildegarde von Bingen from college and immediately ordered a used copy of her Physica from Amazon. But I was too curious about these cakes to wait to confirm the reference when the book arrived.  And I  mean..  it's Duke Sir Cariadoc's redaction.  I'd definitely consider him pretty reliable as a source.

So in between straining the last of the peach brandy and making a batch of dough from Scappi's Feast Day Cheese tart to experiment with for the peach hand pies, I mixed up the small cakes.  Cariadoc suggested 1 tsp nutmeg & cinnamon and half that for the cloves and one quarter that for the salt with 1 cup whole wheat flour and 1/4 cup water.


It took me 1/2 cup of water to get dough that was smooth -I wonder if he was using white whole wheat flour originally.  I also separated the dough into 12 pieces rather than the 4 he suggested.


The end result was sort of a dense, chewy, vaguely clove tasting bread. I think next time I'd use less clove.  "a bit of clove" compared to an "equal measure of cinnamon" and nutmeg seems to me to be less than half the amount and clove has a very strong flavor anyway.  When pretty much proves Cariadoc's never trust a redaction unless you see the original because you never know what liberties the redactor took" advice in the introduction.2    It probably wasn't bad for the middle ages -and the recipe was supposed to be medicinal anyway.  But if I made it again, it would probably be for camp breakfasts and spread thickly with apple butter.

Still it was an interesting experiment.  And I have a whole book of redactions to try and primary sources to track down.  Not bad for a Sunday night!

------------------------------------------------------------------------------------------
1 Friedman, David and Elizabeth Cook. How to Milk an Almond, Stuff an Egg and Armor a Turnip. Self published, 2011.  referencing Throop, Prisilla, tr.  Hildegarde von Bingen's Physica.  Rochester Vermont: 1998. Healing Arts Press

 Ibid.

Friday, August 12, 2016

Drawn Thread Embroidery/HSM #7: Monochrome

Ever since  HSM #3  I've been kind of obsessed with drawn thread embroidery.  I wasn't satisfied with how the legs came out on my drawers, but I loved the technique.  My first big project was half a dozen largesse napkins and while I was working on those at events and Barony meetings, people kept asking "What are you doing?"  so I offered to teach a class on the most basic drawn work stitch:  Hem stitch at Royal University Meridies in July.

I put together 6 kits with a practice piece with threads pre-drawn and edges folded up so that each student could start practicing right away and a napkin with pre-drawn threads to take home and finish.  And just in case, I printed out 9 sets of my class handout.  I'd planned on 3-4 students and lots of one on one time for each of them. Except that I had over 24 students! Thankfully, I had extra linen in my basket to make more practice pieces on the spot and my students were gracious about the lack of materials and instructor time. But I felt bad that I couldn't spend more time with each person.

So imagine my surprise when I find that one of my students enjoyed the class so much she blogged about it! I am over the moon to have passed on my love of drawn thread embroidery to someone else. :)

Once I felt like I had a grasp on basic drawn work, I started thinking about a partlet with drawn work.  My plan was to have it done and wear it for my class as an example, but alas, life intervened.

16th century Italian portraiture shows a lot of elaborately decorated partlets (called colletto in Italy), some of which looked like it could be drawn work.

Attributed to Lavinia Fontana
Portrait of a Woman with a child,
traditionally identified as Eleanora d'Medici
Private collection

Detail of Giovanna of Austria and her son, Phillipo
Giovanni Bizelli c. 1586
Galleria degli Uffizi, Florence, Italy

Better still, I had 2 extant examples of hemstitching on neck and wrist ruffles. Neither example was specifically Italian, though.
The Sture shirt, discussed in Arnold's PoF 4
currently located at Uppsala Cathedral, Uppsala, Sweden

Gollar (German partlet)

Jay had finished his second blackwork project, which was a collar for me and I decided to use it for a colletto with drawn work down the front and on the neck ruffle.  While I couldn't specifically document blackwork and drawn work together on the same colletto, Landini states "In the third decade of the 16th century, nets and partlets became the article of clothing which, along with the head-dressing and the sleeves, most lent itself to imaginative invention and personal choice"1 so I was comfortable with my plan being within the realm of "imaginative invention" in the 16th century.

I had already made a simple colletto based off this example and since my focus in this was the drawnwork, I used the same pattern, but made it several inches longer, since the first one always felt too short when I wore it.


Detail from the Arcade Vault Fresco
Alessandro Allori c. 1589
Tapestry Apartments, Pitti Palace
Florence, Italy


It was all handsewn with linen thread, using flat felled seams and a 1/4" hem around all edges.  I used Gutermann silk topstitch thread to fingerloop braid the ties at the neck. The actual technique for the drawn work is discussed here. The bottom has a  drawstring casing through which I threaded handwoven linen tape from a friend's etsy shop, Tied to History.

I'm actually rather pleased with how it turned out.


The Challenge: #7 Monochrome

Material:  3/4  yard Fabric-store.com 020 linen

Year:  second half of the 16th century, Italian

Notions:  linen thread, silk topstitch thread, Aida 22 count cloth & cotton floss for the blackwork collar

Pattern: self drafted based on the shape from the Allori fresco

How historically accurate is it?  60%?  The aida cloth is not historically accurate, nor is the cotton floss and I can't find an example of drawn work and blackwork in the same partlet.  

Hours to complete:  no idea.  I've been working on and off on this since April.

First worn:  When it gets cooler.  It's too hot to wear anything but Roman at events at the moment.

Total cost:  $4.95 for a spool of silk topstitch thread because I ran out after the first tie.  Everything else was from the stash.
______________________________________________________________________
1  Landini, Roberta Orsini and Bruna Niccoli. Moda a Firenze 1540-1580. Firenze: Edizioni Polistampa, 2005. Page 120.

Saturday, July 23, 2016

HSF 4, 5 & 6: Catching Up

While I actually completed the Historical Sew Monthly challenges in the appropriate month, I am just now blogging about them so this is going to be a collective post about the 3 challenges I am behind on.

HSF #4   April:  Gender-Bender

Sometime over the last holiday season, Pietro took up counted blackwork.  I and several friends convinced him that it was just like drawing on graph paper.  Only you were using floss to draw on fabric. The original plan was to make something small to see if he liked it.  To the surprise of all of us (and him) he took to it like a duck to water and that small project turned into a collar and cuffs that took him about 3 months to finish. Not wanting to dull his enthusiasm, I wanted to get the collar and cuffs on a shirt he could wear as soon as possible. 

I used the same pattern an construction that I used for HSF #1  since my goal was to get him a shirt to wear quickly.  I'd been looking at coloured ties in various portraits and decided to do a black and white fingerloop braid.  I kind of ambivalent at the end result.  I don't hate it, but I don't like it as much as I thought I would.  I think I'll do the next shirt with a solid black tie and see if I like it better.


The Challenge #4  Gender-Bender

Material:  2 3/4 yds of Fabric-Store.com 019 linen (5.3 oz)

Pattern:  Pattern #9 from Patterns of Fashion 4

Year: 1580-1620

Notions: DMC floss, Aida 14 count cloth, #10 cotton cord for ties,  80/2 linen thread for hand sewing, poly thread for machine  sewing

Hours to complete:  10-12    I'm getting faster at these shirts!

How historically accurate is it? maybe 70%  The pattern is from an extant shirt but its been altered slightly to make it legal for SCA rapier combat, I can't specifically document the blackwork pattern to an extant modelbuch or garment, the ties should probably be made out of linen rather than cotton and I machine sewed long seams on it (but hand finished everything).

First worn:  April 2016  and worn several times since

Total cost:  $0   everything was from the stash


HSF #5   May:  Holes


Summer..even Spring in the Deep South can get pretty bloody hot.  After getting sick from the heat wearing tightly laced 16th century Italian, I broke down and did what I swore I was never going to do:  I decided to make a Greco/Roman outfit.  A chiton so I could at least cover my arms.  (Croom calls this a "gap sleeved tunic"1)And, added benefit: a chiton had openings on the sleeves that would count as holes!

My first try was with linen and it was definitely a no-go.  I felt like the Hindenburg and it did NOT drape anything like the sculptures.  Which left me with an interesting conundrum.  Should I go with rayon for a more accurate look or go with linen for a more accurate fabric?   After some pondering the "I have to not actively hate what I look like in it" won out and the Tuesday before I planned to wear it, I went to the local fabric nirvana Fine Fabrics (literally a warehouse of fabric) but they had no solid coloured rayon.  So......  I bought some lovely red silk instead. Silk is not generally favored as a good warm weather fabric in re-enactor circles because it doesn't breathe as well as linen, but it was light and the arms were open, so I decided it had to be better than 16th century Italian.  

Silk was used by the Romans, but was very expensive since it was imported from China and always seen as decadent.2  Doubly decadent  because it was scarlet which was considered to be nearly as decadent as purple.3  It may be decadent, but I knew it was the right call because when I  pinned the two pieces together it draped beautifully and gave me folds straight out of a sculpture.

 Holes!


I found some cute Roman sandals on Amazon for under $20 and wore Roman to the event that Saturday.  Since then I have dug deeper into actually researching Roman clothing and rather surprisingly, find the Roman era pretty fascinating.  The clothing doesn't change much but the hair styles and jewelry do; I've tentatively settled on the late 1st - early 2nd century era to focus on since the first wearing have  made myself an under tunica to minimize wardrobe malfunctions.  I also want to delve into wig making to do justice to some of the Roman hair styles.   This is classic "Compulsive Elaboration Syndrome"  -I can't just knock out a fast chiton to wear in the summer... I have to understand the whole outfit and where exactly it fits into the Roman timeline...oy.   I am also..  um...  looking at Roman glassware for a set of feast gear and might have been reading Apicius on Project Gutenberg.

The Challenge:  #5  Holes

Material: 3 1/2 yards of  silk  it wasn't as slippery as a charmeuse, but it was more substantial than a habotai.

Pattern:  None.  It's 2 pieces of 45" fabric, hemmed, sewed up the sides partway and caught at several points on the shoulder

Notions:  Poly thread for the machine sewing (I was in a hurry or I would have done it by hand) and silk thread for the hand sewing

Hours to complete?   maybe 4 since I hand hemmed the top and bottom edges

First worn:  Early June 2016

Cost:  $35 for the silk


HSF #6   June:  Travel

No respectable Roman lady would venture outside her home without the palla.4  So for the June challenge, I am using the palla I made to go with my gap sleeved tunic.

The palla is a large rectangle of fabric most commonly pinned at the left shoulder, brought around the back, under the right arm and either draped over the arm or flung over the left shoulder.  

I chose sheer navy blue silk.  I had read that blue was an expensive dye for the Romans, but I cannot for the life of me find the source for that now.  


Note:  I am not wearing this in the manner discussed above.  I didn't have a pin at the time.  
But there are examples of alternate drapings for the palla.

The Challenge:  #6 Travel

Material:  3 yards of silk

Pattern:  None

Notions: None

How historically accurate is it:  80%   I can't find the reference to blue dye, but silk was available in the Roman era.

Hours to complete:  A  couple of hours fringing the edges

First worn:  early June 2016

Cost:  $30 for the silk


And  with that I am caught up on my challenges and have my July project in progress.  I  have now made it further than previous year I've attempted the Historical Sew Monthly.  Yay me!

_________________________________________________________________________________
1   Croom, Alexandra. Roman Clothing and Fashion  Gloustershire: Amberley, 2000. 
2   Ibid page 19.
3   Ibid page 27.
4   Ibid page 104.

Monday, July 18, 2016

Adventures in Renaissance Cooking

My dear friend Alessandra  Fioravanti's elevation to the Order of the Laurel was at Royal University Meridies this past weekend and Baroness Leda Sands and handled the food for her Vigil. This gave me an excuse for playing with some Renaissance recipes and I enjoyed it enormously.  I also learned a good bit about feeding large quantities of people.


The first hurdle to surmount was food allergies of various people that would be in attendance.  Pork, beef, melon, green peppers, mushrooms & tomatoes were all immediately off the ingredient list. Since I am allergic to mushrooms myself, I was very sympathetic, but it did make finding recipes a bit more complicated.

The menu we ended up with was a mix of period and modern dishes loosely on the theme of "breakfast"

Baroness Leda did:
Biscuits and gravy
Chicken sausage
Fresh strawberries
Orange Juice
and Champagne for the mimosas that Mistress Alessandra would offer her guests

and  I made:
Shortbread
Candied citrus peel
Lemon curd
Cheese tartlets
Rice pudding topped by spiced plum mousse with honey
Honey nut clusters


Shortbread

I had this crazy idea in my head that the cookies should be stamped with the giglio on Mistress Alessandra's heraldry and the giglio on the cookie should be in edible gold.   It took some mad google fu but I found a lady in Australia that sold a fleur de lis cookie stamp. The only giglio stamp I could find was $80 so a fleur de le lis  would have to be close enough. I used the shortbread recipe she provided to make sure the stamp would work (the only significant difference from my usual shortbread recipe was that there was a small amount of rice flour added and  it called for caster (superfine) sugar.

The stamp worked surprisingly well,  although the rough edges  needed to be cut off with a paring knife after each cookie was stamped.  Not difficult, but it took more time than I anticipated.

I got liquid edible gold and cake decorating brushes to gild the cookies.  Despite my non-existent illumination skills, I can paint a cookie well enough and the gilding went off without a hitch, although the cookie surface was a little rough since each ball of dough had to be rolled in sugar to keep the cookie press from sticking.

Finished cookies.  I'd intended to paint in stamen to make 
the Fleur-de-Lis a Giglio, but alas there wasn't time

Candied Citrus Peel 

There is a recipe in Menagier de Paris for Candied Orange Rind that has you soak the orange rind in water for 9 days, boil it in honey and then let it sit for a month before eating it.  I chose a simpler, more modern recipe using sugar.  It was still a lot of work.  Mistress Serafina and I spent an entire afternoon peeling a dozen oranges and a dozen lemons and the end product was a little over a quart ziploc bag of candied peels. Still, the finished product was absolutely delicious and  I will probably put them on the regular rotation of things to make for events, regardless of the amount of work involved. At some point I may try the Menagier de Paris recipe once  just because I'm curious, though.


orange peel boiling in simple syrup

Lemon Curd

I can't document lemon curd earlier than the early 1800s, but Leda and I both love it and I needed something to do with the rest of the lemons for the candied citrus peel. It was surprisingly easy to make and I may need to work harder to see if there is any case whatsoever for it being eaten pre-1600. And it would go beautifully on the shortbread or with the fresh strawberries, so it stayed on the menu.

Cheese Tartlets

I used Scappi's Feast Day Cheese Tourte (Scappi V 81) which called for ricotta, cream cheese, fresh mozzarella & Parmesan, eggs, cinnamon and raisins in a crust. Thanks to a serendipitous Goodwill find of 6 mini muffin tins for $1 each and an amazing little tool I found on Amazon,  I decided to do bite sized tartlets rather than a full pie. This was a great idea, but these were the last thing I  made the night before and after the first 72 tarts, I ended up putting the rest of the filling in a single pie crust.  I

A tart tamper.  You put a ball of dough in the mini muffin tin
 and press the tamper in to make a little cup of dough


Rice Pudding with Almond Milk
This was a combination of several recipes.  I prepared the rice by soaking it in warm water for 30 minutes then drying it in a 200 degree oven for an hour as per Scappi, but I heated my almond milk before adding it to the rice and added rose water.   Preparing the rice was time consuming but it cooked up perfectly and was worth the extra effort.  I have to admit I did not make my own almond milk, though.  I used Trader Joe's Unsweetened Vanilla almond milk, which I picked up by mistake, thinking it was the plain unsweetened.  I was very glad there were left overs, because I could eat this for breakfast every day and not get tired of it.

Spiced Plum Mousse with Honey
This is found in Forme of Cury and the original recipe calls for fresh plums.  I had just finished racking a batch of plum brandy and had the re-hydrated dried plums that had been soaking in brandy for 6 months, so I used those instead. I'm curious to try it with fresh plums, but I am very happy with the current result.   It's not terribly pretty Not only was this tasty atop the rice pudding, it was delicious spread on a biscuit.

Honey Nut Clusters (Nucato)
I found this recipe in Redon's The Medieval Kitchen:  Recipes from France and Italy which lists the source for it as Libra della cuicina del secolo XIV.  That is not a text I am familiar with, and in the interest of full disclosure I did not independently corroborate the source. The original recipe and other mentions of it I have found on the Web say to spread the hot mixture out on parchment and cut it like peanut brittle.  Thankfully, I did a test run on this to take to Artsy Crown, because spreading it on parchment was an epic failure.  The parchment stuck to it, it wouldn't cut and I ended up reheating it in the oven to be able  to scrape it off the parchment.  I  also realized that it was very sensitive to heat and humidity.  By day two of Artsy Crown it was one big lump you had to rip a chunk off of to eat.  Knowing this, I used mini peanut butter cup molds and lots and lots of spray coconut oil to keep it from sticking and kept it in a cooler until it was time to set out the food.  It still managed to melt on the tray by the end of the day, but it was far more successful than try #1.

Nucato, already on the way to becoming  melted blobs

What I Learned
The finger foods (cookies, tartlets, strawberries, nucato, candied citrus peel) were the most popular. Very few people were interested in what was in the chafing dishes.  Perhaps lifting the cover was too intimidating?

Labels with what the food was and the ingredients in each dish are absolutely necessary.  I'd cut them from my to-do list due to time constraints and ended up using blue sticky notes because there were so many questions.

Do a test run with everything!  I'd never used sterno for chafing dishes before but it seemed easy enough.  But the sterno canisters were too large for the dishes and after 5-10 minutes had to be extinguished because the sausages were already burning.  It was far from the worst thing that could have happened, but it was a failure that was totally avoidable.

Over all, it was a fun experience and I was happy to make Mistress Alessandra's day a little more special.  There is definitely more experimenting with period recipes in the future!

Saturday, June 11, 2016

Household Artifacts: European Sewing Tools 1150-1600 in Practical Use

Last summer I became fascinated with pre-1600 sewing tools and began to work towards creating a historically accurate hand sewing basket to use at SCA events. Because my own persona is mid-16th century, I’ve been looking more into late period tools than Viking/early period (although there were some excellent early period tools, such as the Viking “chatelaine”)


My research began as a practical exercise, rather than a theoretical one, and grew organically into discussing trends and evolution of sewing tools. My long term goal is to collect and document sets of tools in various centuries and cultures, showing the technological progression between eras and geographical areas.

From a practical perspective, the most interesting result of this project is the change in mindset that comes with using these sewing tools. To the modern sewer, especially one with a theatrical background like myself, items like needles, pins, thread and hooks and eyes are cheap, bought in bulk, and readily available. They are tools used without thinking. I cannot count the number of times I’ve misplaced a needle and just reached for another, swept the pins on the floor up as trash because it wasn’t worth picking them up, or tangled a piece of thread and just snipped it and started with a fresh strand.

But having only six medieval needles (and my persona would be exceptionally wealthy to have so many!) I find myself being quite careful where I put my needle when I am done with it because loss of one is significant.  And the price of linen and silk thread causes me to cut smaller lengths of thread to sew with and take smaller, more careful stitches because I do not want to waste the quantity I have needlessly. Making my own pins and hooks and eyes causes me to keep a far closer eye on items that were previously used unthinkingly.

I am regularly discovering new sources to look into and the more I research the less I feel that I know. It’s a fascinating, fractured subject to research involving a variety of academic disciplines and I can easily see myself absorbed by it for years.

I hope you enjoy reading about this topic as much as I enjoyed delving into it.


Household Artifacts: European Sewing Tools 1150-1600 in Practical Use


Note:  I've added a "My Articles" Section on the top navigation bar.  You can also find this article and others I've written there.

Sunday, April 17, 2016

The Merlot entari (or Famous last words: this will be simple and fast)

A post in between HSM challenge posts...  say it isn't so.  As usual, I am working on a variety of things and we have been going to SCA events nearly every weekend, so there is never enough time to do even a fraction of what's on my project list, much less blog about it.

But I have finished (finally!) an entari I am reasonably satisfied with, so I have something to wear besides my rust Italian gown. *happy dance*

My entari

extant late 16th c. entari of a similar style  from www.turkishculture.org

example of  Ã§aprast down the front of an early 16th c. garment from www.turkishculture.org

Illustration that inspired the colors (which upon further reflection looking at the hat, is actually probably post 1600)
from Recueil de costumes turcs et de fleurs Bibliotheque Nationale de France www.gallica.bnf.fr

I actually started this project back in late January, thinking that I'd knock out a fast new entari and wear Ottoman for Midwinter A&S. *cue ominous music*

I had some merlot colored cotton with a lovely hand to it in the stash and I got the pattern cut out and started construction easily enough.  Then I got to attaching the front and back at the shoulder.  I could split the front up the middle and move on with construction.  That would have been the sane and responsible thing to do. 

But I had a pile of 9 finger-looped black braids that had not worked out as points for Pietro's hose. The braids fell onto the fabric and  now I had a vision of black Ã§aprast down the front of the entari.  

I was lost.  I couldn't not add the Ã§aprast now.  After all...  I wasn't doing anything else with the braids. And of course, once I got started the 9 braids weren't nearly enough, so there was more finger-loop braiding and much hand stitching of trim (and then taking off and resewing of trim in other positions once I tried it on).

I started out with the front flat on my cutting table marking lines where I planned the Ã§aprast and starting to stitch the trim while it was on the table. But as the projected dragged out after Midwinter, I needed the cutting table and I ended up wrapping the front around a macrame board and pinning the excess on the back like a dress shirt in its package.  

That actually turned out to be an inadvertent, but brilliant idea.  It made stitching the trim go much faster since I could turn the board as needed rather than try and stretch myself over the cutting table.


çaprast in progress on the macrame board

Once the Ã§aprast were on, the rest of the garment went together without much incident.  The fabric was generally well behaved, the lining didn't sag in odd spots and the facings didn't pull or buckle peculiarly. 

Typically 16th c. Ottoman women wore more than one entari over their gomlek (the Ottoman equivalent of a camicia) so I reused the Caterpillar entari  to wear underneath and made a pair of long sleeves for the previously short sleeved garment.  One of the many reasons that I am enchanted with 16th c. Ottoman is the detachable sleeves.  It expands the mix and match options of a limited garb wardrobe exponentially.

extant late 16th c. entari with detachable sleeves from www.turkishculture.org

I got this done for Coronation...  only a month and a half after my original goal and I've worn this outfit to several outdoor events (90% of  SCA events in Meridies are mostly or entirely outdoors)  It is amazingly practical.  I still have the swish of skirt around my ankles,  but I don't trip over my hem or drag it in the mud, I can take off the sleeves if it gets warm in the afternoon and if I'd doing something like loading/unloading the car, I can tuck the front hems in my belt and it's not only practical, it's actually historically accurate!

illustration from Codex Vindobonensis 8626  c. 1590 at the Austrian National Library


In other news, Jay has finished his first blackwork project: a collar and cuffs and I am making a shirt using them and I am also still in the midst of my drawnwork obsession so there is much going on... watch this space!

Thursday, March 31, 2016

HSM Challenge #3: Protection: 1600 Italian drawers

I have been remiss in posting, but (and this seems to be a recurring theme) I am too busy actually making things to think much about blogging. In addition to sewing for the HSM, I have also been working on a 16th century Ottoman entari and new tarpus.

For the Protection Challenge, I decided to make a pair of late 16th century Italian drawers. It's not a really glamorous project, but I made two promises to myself about the HSM this year.  1) I would finish it this time if it killed me and 2) what I made for each challenge had to be something I would actually find useful....  I'm still waiting for an opportunity to use the rhinestone heeled shoes from my last HSM.

Most of the SCA events we go to are outside, which means using portajohns.  Wrangling 16th century skirts in one of those is no fun.  There had been some mention on some of the groups I follow (Elizabethan Costuming maybe?)  that open drawers were easier to manage than modern ladies underthings. And they would make me feel a bit more accurate from skin out.

I'd been meaning to make the Margo Anderson drawers from the Italian Ladies Underpinnings set, but when I finally pulled out the pattern, they had an attached crotch. I could have modified it, but Patterns of Fashion 4 had two pairs of drawers in it.  Since my waist measurement fluctuates (usually down, thankfully), I decided on the pattern for the drawstring waist rather than the waist band.

 Arnold's original pattern from Patterns of Fashion 4

Yup, that looks right to me.

Arnold's note on the original pair (Metropolitan Museum of Art TSR 10.124.3) said they were made out of "even weave white linen, light in weight (discolored), closely woven"1  One of Margo's notes on the drawers in her pattern was to use a linen suitable for a shirt or summer pants or they would tend to ride up uncomfortably.2  Since I had some 019 from Fabric-Store.com on hand, I decided to use that.

Sam supervising while I cut the pieces out

One of my ongoing projects is researching medieval and Renaissance sewing tools and creating a historically accurate set for practical use, so I started by using a hand forged steel needle I have. It's 47mm in length and 2mm wide at the eye.  It appears to be based on a find in the Museum of London.3  However, it was like sewing with a log.  I normally find hand sewing restful and rather zen, but sewing with this needle was actively unpleasant.  I blush to admit it, but I quickly wimped out and went back to a modern needle.

This needle is HUGE!

I also started this project using some extant 16th c. pins that I purchased for a surprisingly reasonable price from www.crossmancrafts.uk.  However, I move from room to room with my sewing a lot and take my sewing basket with me places and I was too worried that I would lose one of the 10 pins I had, so I reverted to using modern pins.

Apparently pins haven't changed much in 400 years.

The extant pair were sewn with pink silk, so I used Gutermann silk topstitch thread for my seams, which were done run & fell style. 

If I make another pair, I will skip the pink thread, I honestly don't think it adds all that much.

One other piece of medieval technology I tried and actually liked a lot was my sleek stone. Sleekstones, also called linen smoothers, slicken stones or calenders, were usually made of stone or glass and were used without heat, but often with water, to smooth linen and presumably press seams open. Extant examples of sleekstones date back to at least the Viking era and they were used well after the invention of the solid iron.  I got mine at www.historicalglassworks.com.  Since I move around a lot with my sewing, keeping one in my sewing basket is very handy.

My sleekstone does a surprisingly good job on linen, even without heat.

The extant pair has embroidery around the bottom of each leg, but since this was an experimental project, I didn't want to take the time to do embroidery.  But I did want to do something decorative. A friend gave me a tutorial on drawn thread work last month, so I decided to do a bit of hem stitch & ladder stitch. It actually went much faster than I expected. And I am now completely addicted to to drawn work!  I'm still a rank beginner, but it is really zen to do and I see a lot more of it in my future.

 Pulling the threads out can be a bit of a pain but the end result is worth it

My first finished leg!

A friend of mine sells handwoven narrow wares and trims and I used 1/4" linen tape from her as a drawstring.

Alessandra does lovely work! 

I am not a small person, so I was a little worried that the finished drawers would be a bit small, but they are actually enormous!  

The finished project

All in all this was a relatively easy but useful project that I'd been meaning to make for a while. And bonus: it got me hooked on drawn thread work.

The Challenge: #3 Protection

Material: 5.0 ounce linen

Pattern: Patterns of Fashion 4: 64. c. 1600 pair of drawers

Year: 1600

Notions: silk  thread, handwoven linen tape

How historically accurate is it: 80%?  Materials were accurate..  mostly.  Technically, the silk thread would have been 2 ply not 3 ply and modern linen and 16th century linen have significant differences. 100% hand sewing but other than the experiments with HA tools that I mentioned I used modern tools.

I also have no definitive indication that hem stitch was used on drawers.  I can document it to collars & shirt cuffs and the occasional partlet in paintings, but with occasional exceptions drawers were rarely seen in 16th c art so actual examples are few and far between.  If drawn work was done on other "fatta en casa" garments, I don't think its implausible that it might have been used on drawers

Hours to complete: 10 -12. (I really need to improve my hand sewing speed)

First worn:  The next time I wear my 16th c. Italian garb. We're doing 3 events in April so it will be sometime soon!

Total cost: $24 for the silk thread and linen tape (but I have excess of both to use on other projects)

_________________________________________________________
1 Arnold, Janet.  Patterns of Fashion 4. London: Macmillan, 2008.  ISBN: 978 0 333 57802 1. Page 106.
2 Construction Notes from Margo Anderson's Italian Ladies Underpinnings 
3 Egan, Geoff. The Medieval Household: Daily Living 1150-1450. 2nd ed. Suffolk: Boydell Press, 1998, 2010. ISBN 978 1843 83543 1. Page 267.

Tuesday, March 8, 2016

HSF Challenge #2: Pleats and Tucks

This post is very tardy. I finished the apron on time for the February challenge, but was out of town for work for a week, so I am just now getting the blog post written up

My original plan was to do a make a new Italian gown to wear for Midwinter Arts & Sciences in February and use for the "Pleats and Tucks" challenge since the skirt would be pleated to the bodice and 16th century gowns often have a tuck at the bottom. Except that I kept waffling on a clear concept and nothing got started.

So with half of February already gone I decided to make an apron to go with my late 16th Italian working class gown. It wasn't an brilliantly exciting project, but it would have pleats and I'd been thinking about making one for a while (Too many projects, too little time!)

I'd read a little about smocking at germanrenaissance.net and pleatworkembroidery.com and I'd always been meaning to try my hand at smocking, so I decided on an apron with some simple smocking on it.

Different types of smocking stitches


Both sites had what seemed to be solid references for their information (including a fascinating article on How to Pleat a Shirt in the 15th Century discussing extant garment fragments from Lengberg Castle) I used the apron tutorial from germanrenaissance.net in lieu of doing my own research but I did learn a few things.  Smocking is more of an 18th-19th century term; the German word is "fitz-arbeit" (literally pleatwork) and pleatwork seems to be the more accepted term for it in the reenactment circles.  It was especially popular in Germany, Italy and to a lesser extent England in the late 15th - early 16th centuries and can be seen on collars, cuffs and aprons in paintings and engravings such as this one (her apron has pleatwork at the top):

Albrecht Durer 
Melencolia I
1514

While white aprons were the most common in the era, there are some examples of colored aprons in paintings such as Campi's The Fruit Seller.

Vincenzo Campi
The Fruit Seller
1580

Since my current gown is based on a Campi painting, I decided to use some sea glass green linen I had on hand.  (Fabric-store.com calls it "turquoise" but its really a lovely winter sea color.)

The tutorial provided (what I thought was) a handy template for placing the dots on the fabric but the prick and pounce method of transferring the dots was a complete fail.

 the template from germanrenaissance.com

Sam supervising me punch a whole lotta holes in the template

While I finally got the transferred with a fabric marking pencil, I knew if I ever wanted to do more pleatwork (and I was pretty sure I did) I knew I'd need a better method.  So I picked up a smocking kit from PimpYourGarb on Etsy.  I haven't used it yet, but it looks infinitely easier than my current template.

Smocking kit from PimpYourGarb on Etsy


Once I had the dots on the fabric, the actual apron went together pretty easily. So easily in fact that I forgot to get process pics.  Hem the three edges of the fabric without the dots run gathering threads through each row of holes, gather into pleats and smock.  I used a honeycomb stitch which consists of stitching the first 2 pleats of the top row together with a few small stitches then the 2nd & 3rd pleats together at the second row, the 3rd & 4th of the top row, et al for each 2 rows of gathering threads.  (the tutorial I linked above does a much better job of explaining the technique) Once it was smocked, I put on the waistband and voila, the apron was complete.

 The finished apron

Closeup of the smocking

I learned a lot from this first attempt and reading a few more tutorials.  In retrospect, I'd add more rows of dots so the smocked section was deeper  and I'd probably use a 1/4" grid for the dots. But its definitely a technique I enjoyed playing with and I plan to do more of.  In fact, I am sorely tempted to do v2 of the apron for the protection challenge this month.

The Challenge:  #2  Pleats and Tucks

Material: Linen


Year: This style of apron can be seen in paintings, woodcuts, etchings from the 14th - early 16th centuries.

Notions: Poly thread (I thought I had linen thread of a similar color but I didn't)

How historically accurate is it:  60%? The end product is visually similar to various paintings, etchings and woodcuts from the 14th -early 16th centuries.  The proportions are similar to several extant late 16th- early 17th century decorative aprons in the Art Institute of Chicago and the Met. The extant aprons linked above are made of linen so a case can be made for linen being historically accurate. But there have been multiple comments on the Elizabethan Costume group that wool would be more appropriate for an apron for the simple fact that the risk of it catching fire is lower. To be honest, I haven't done enough research to know if wool would be more accurate for a working class apron or not. All the stitching on it was done by hand; however, the thread is inaccurate and the method of transferring the dots is decidedly modern.

Hours to complete:  6-8.  At least half of it was punching holes in the template, enlarging holes in the template and finding a successful method to transfer the dots.

First Worn: February 27 at the Meridian Challenge of Arms

Cost:  $0.  Everything was out of the stash.